Jekyll for Blogging
W
ith the many great Content Management Systems (CMS) out on the web, selecting the right solution for a developer blog can be somewhat of a daunting task. First, there is WordPress that powers 27% of the world’s websites according to WikiPedia. It is a great piece of software with a large community of users and many plugins and themes to help customize your site and let it stand out.
A WordPress site however requires quite a lot of maintenance. First there is the backend database where content is stored. Then there is the software and plugins themselves that needs to be kept up-to-date with the latest security patches. The database needs to be backed up frequently as well which requires additional plugins to be able to do that. There are times when plugins can sometimes cause issues due to version conflicts.
I needed a minimalist and highly customizable tool to make it easier to maintain and publish content and Jekyll was the ideal solution. Unlike WordPress, Jekyll is a static site generator that uses templates to transform plain text files written in markdown syntax into static HTML pages that can be hosted on any web host or on GitHub pages. There is no need for server-side scripting languages like PHP and there is no need for a database for storing content. I can also use Git to version control my blog.
This post describes the process I followed to set up Jekyll as my publishing platform.
Pre-requisites
Jekyll is written in the Ruby programming language and requires the following pre-requisites:
- GNU/Linux, Unix, or macOS operating system.
- Ruby 2.0 or later
- RubyGems
- GCC and Make
Windows is not officially supported but there are instructions to install Jekyll on Windows here.
Installation
The installation of the pre-requisites will depend on the operating system you are using. I used the apt package manager on my Ubuntu system to install the packages as described below:
-
Ensure your system is up-to-date, then install build-essentials package that has all the other dependencies and compiler collection:
$ sudo apt update $ sudo apt upgrade $ sudo apt install build-essential -
Ruby and RubyGems installation.
$ sudo apt-get install ruby-full rubygems -
Install Jekyll and Bundler gems through RubyGems
$ gem install jekyll bundler
Create a Jekyll site
Once you have the software installed, you could then create a Jekyll site as follows:
$ jekyll new myblog
This will create the directory myblog along with all the blog files within the directory.
.
├── about.md
├── _config.yml
├── Gemfile
├── Gemfile.lock
├── index.md
└── _posts
    └── 2017-05-31-welcome-to-jekyll.markdown
From the above listing, the files ending in .md or .markdown are markdown files that will be rendered into html pages. The _config.yml file contains some basic configuration settings for the default site. Finally, the Gemfile and Gemfile.lock files determine the dependencies and their versions. These dependencies are other ruby packages (Gems) that are needed for the Jekyll site.
You can run the following command to have Jekyll render your site into html and serve them using a test server.
$ bundle exec jekyll serve
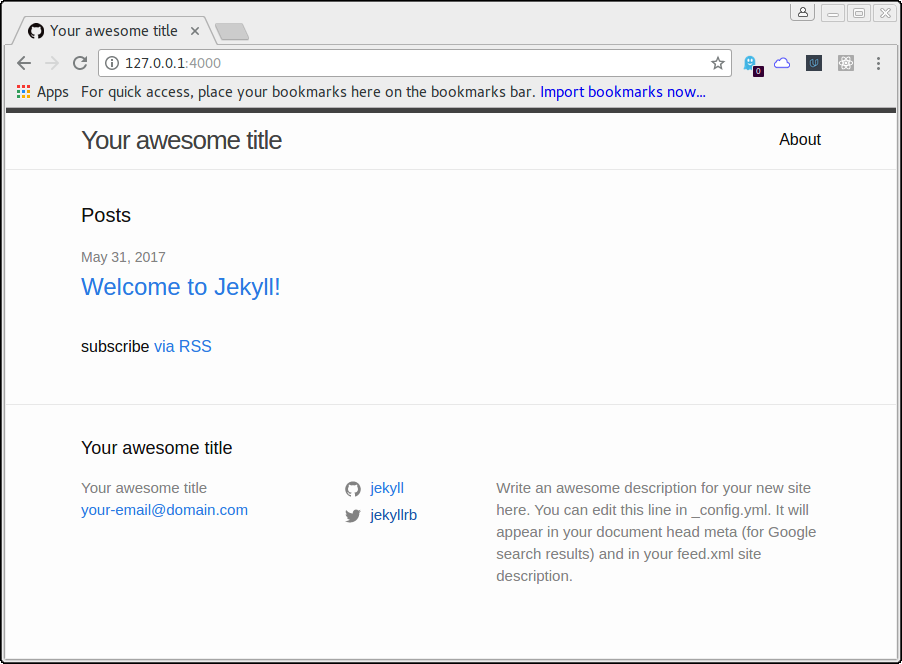
This will start the Jekyll server listening at http://127.0.0.1:4000/. Navigate to http://127.0.0.1:4000 and you should see the default site similar to the screenshot below:

This is a very basic site with the bare minimum required. The site can be customized using many themes as seen at JekyllThemes.
Next Steps
One of the best ways to get started with Jekyll is to use one of the example themes to build and customize your own site. As an example, have a look at Long-Haul. This theme can be customized as needed and content added to publish your blog.
I will cover template customization on an upcoming post.